Integration Guide
Introduction
Use the Nami ECR App to integrate payment acceptance into merchant workflows. This guide provides step‑by‑step instructions for setup, transaction initiation, and response handling.
For environment setup and SDK details, refer to Android SDK Library.
Supported Connections
| Connection Type | Supported | Notes |
|---|---|---|
| TCP/IP (Wi‑Fi) | ✔ | Recommended for stable and fast setup. Uses socket connection with terminal IP + port. |
| Bluetooth | ✔ | Requires pairing the terminal with the POS/mobile device first, then connecting via SDK. |
| AppToApp(Intent) | ✔ | Uses Android Intents to launch the mada POS app, send transaction requests, and receive responses. |
| AppToApp(LocalHost) | ✔ | Uses local WebSocket/localhost bridge for communication between merchant app and mada POS app. |
| USB | ✔ | Supported via Android USB interface; requires CDC mode enabled and device permissions granted. |
App-to-App
Transaction Flow
Set Up Environment → Configure POS Terminal → Pack Request → Launch POS App → Send Transaction → Receive Response → Parse Response
Integration Steps
Note: The application requires changes at both the project level and the application (code) level.
Make these updates before you start integration.
Step 1: Set Up Environment
Use these entries to configure your Android project before integrating the Namipay SDK. This ensures the application has the correct permissions, USB host support, and SDK linkage.
Add these entries to AndroidManifest.xml:
<uses-permission android:name="android.permission.INTERNET" />
<uses-permission android:name="android.permission.ACCESS_WIFI_STATE" />
<uses-permission android:name="android.permission.ACCESS_NETWORK_STATE" />
<uses-feature android:name="android.hardware.usb.host" />
<intent-filter>
    <action android:name="android.hardware.usb.action.USB_DEVICE_ATTACHED" />
</intent-filter>
<meta-data
    android:name="android.hardware.usb.action.USB_DEVICE_ATTACHED"
    android:resource="@xml/usb_device_filter" />
Add these entries to build.gradle:
repositories {
    flatDir { dirs 'libs/aars' }
}
implementation files('libs/SkyBandSDK-release.aar')
Step 2: Configure POS Application
Enable ECR Mode on the POS app before integration.
Traditional POS → ECR Mode enabled by default.
SoftPOS → Enable ECR Mode via Merchant Portal custom parameters.
Step 3: Provide Function Arguments
Build the request string and compute the signature.
Build request data:
String purchaseReq = date + ";" + purchaseAmount + ";" + printFlag + ";" + ecrReferenceNo + "!";
Compute SHA‑256 signature:
public String computeSha256Hash(String combinedValue) {
    MessageDigest md = MessageDigest.getInstance("SHA-256");
    byte[] hashInBytes = md.digest(combinedValue.getBytes());
    StringBuilder sb = new StringBuilder();
    for (byte b : hashInBytes) {
        sb.append(String.format("%02x", b));
    }
    return sb.toString();
}
Step 4: Pack ECR Request
Use the SDK to pack transaction requests into byte arrays.
Call the pack method:
public byte[] getPackData() throws Exception {
    initialiseData();
    return CLibraryLoad.getInstance().getPackData(reqData, transactionType, szSignature);
}
Step 5: Launch POS App (Intent)
Use an Intent to launch the POS app and send the request packet.
Send request via Intent:
byte[] packData = homeViewModel.getPackData();
Intent intent = requireActivity().getPackageManager().getLaunchIntentForPackage("com.skyband.pos.app");
intent.putExtra("message", "ecr-txn-event");
intent.putExtra("request", packData);
intent.putExtra("packageName","com.skyband.ecr");
intent.addFlags(
        Intent.FLAG_ACTIVITY_NEW_TASK |
                Intent.FLAG_ACTIVITY_SINGLE_TOP |
                Intent.FLAG_ACTIVITY_CLEAR_TOP
);
startActivity(intent);
Handle response:
byte[] receivedData = getIntent.getByteArrayExtra("app-to-app-response");
if (receivedData != null && receivedData.length > 0) {
    String receivedIntentData = new String(receivedData).replace("�", ";");
    ActiveTxnData.getInstance().setReceivedIntentData(receivedIntentData);
}
Launch POS App (Local Host)
Step 1: Use an Intent to ensure the POS app is running and listening on the local port.
Start POS app in Local Host mode:
Intent intent = requireActivity().getPackageManager().getLaunchIntentForPackage("com.skyband.pos.app");
intent.putExtra("message", "ecr-local-event");
startActivity(intent);
USB Communication Integration
Use USB OTG mode when network connectivity is not available.
Step 1: Discover devices:
// Discover devices
HashMap<String, UsbDevice> deviceList = usbManager.getDeviceList();
Step 2: Filter by VID/PID:
// Select by VID/PID
if (dev.getVendorId() == UN20_VID && dev.getProductId() == UN20_PID) { device = dev; }
Step 3: Request permission:
usbManager.requestUsbPermission(device);
Step 4: Initialize connection:
UsbDeviceConnection connection = usbManager.openDevice(device);
connection.claimInterface(cdcControl, true);
connection.claimInterface(cdcData, true);
Step 5: Send request:**
int sent = connection.bulkTransfer(outEndpoint, request, request.length, 30000);
Step 6: Receive response:
byte[] buffer = new byte[2048];
int read = connection.bulkTransfer(inEndpoint, buffer, buffer.length, 90000);
String response = CLibraryLoad.getInstance().getParseData(buffer);
Transaction Types
| Transaction Type | Required Data | Element Description |
|---|---|---|
| Purchase | dateTimeStamp;amount;etpInput;ecrRefNo! | Amount must be converted to 12‑digit string. |
| Purchase with Naqd | dateTimeStamp;totalAmount;naqdAmount;etpInput;ecrRefNo! | Includes cashback amount. |
| Refund | dateTimeStamp;amount;rrn;etpInput;originalDate;ecrRefNo! | Requires refund amount, RRN, and original date. |
| Authorization | dateTimeStamp;authAmount;etpInput;ecrRefNo! | Authorization‑only transaction. |
| Auth Extension | dateTimeStamp;rrn;transactionDate;approvalCode;etpInput;ecrRefNo! | Extends authorization validity. |
| Auth Void | dateTimeStamp;authAmount;rrn;transactionDate;approvalCode;etpInput;ecrRefNo! | Voids authorization transaction. |
| Cash Advance | dateTimeStamp;authAmount;etpInput;ecrRefNo! | Cash advance amount. |
| Duplicate | dateTimeStamp;previousECR;ecrRefNo! | Previous ECR reference number. |
| Reversal | dateTimeStamp;rrn;etpInput;ecrRefNo! | Requires RRN. |
| Reconciliation | dateTimeStamp;etpInput;ecrRefNo! | Settlement reconciliation. |
Sample Application Flow
Step 1: Add SDK to Project
- Download the Android SDK package (
SkyBandSDK-release.aar). - Place the
.aarfile in your project’s libs folder. - Add the dependency in
build.gradle:
implementation files('libs/SkyBandSDK-release.aar')
- Sync the project.
Step 2: Configure Permissions
- Open
AndroidManifest.xml. - Add required permissions:
<!-- General -->
<uses-permission android:name="android.permission.INTERNET"/>
<uses-permission android:name="android.permission.ACCESS_NETWORK_STATE"/>

<!-- Bluetooth -->
<uses-permission android:name="android.permission.BLUETOOTH"/>
<uses-permission android:name="android.permission.BLUETOOTH_ADMIN"/>
<uses-permission android:name="android.permission.BLUETOOTH_CONNECT"/>
<uses-permission android:name="android.permission.BLUETOOTH_SCAN"/>

<!-- USB -->
<uses-permission android:name="android.permission.USB_PERMISSION"/>

<!-- Storage -->
<uses-permission android:name="android.permission.READ_EXTERNAL_STORAGE"/>
<uses-permission android:name="android.permission.WRITE_EXTERNAL_STORAGE"/>
Note: Permissions vary by connection type. Ensure only relevant permissions are enabled.
Step 3: Establish Connection
- Turn on the Nami payment terminal.
- Select connection method:
- TCP/IP: Ensure both devices are on the same network. Use terminal IP address.
- Bluetooth: Pair the terminal with the Android device. Use paired device details.
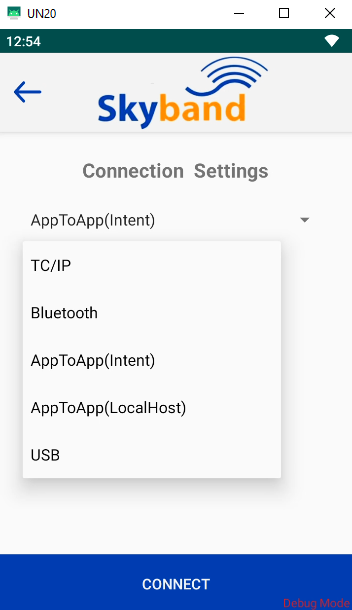
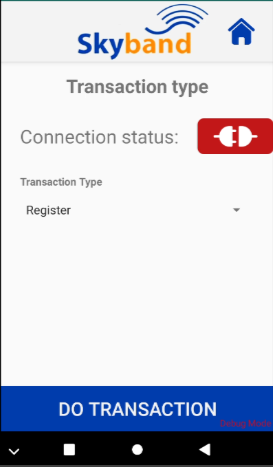
Connection Type
- Initialize the SDK and establish connection.
Step 4: Register Terminal
- Send a Register request with
txnType = 17and your Cash Register Number.
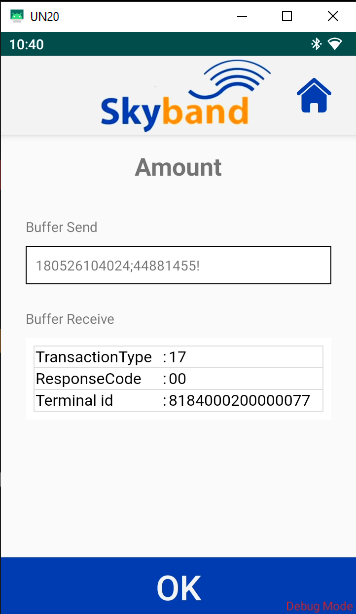
- Expected Result: Success response confirming registration.
Important: Registration is required only for legacy ECR integrations. Local and Cloud Middleware integrations do not require this step.
Step 5: Start Session
- Send a Start Session request with
txnType = 18.
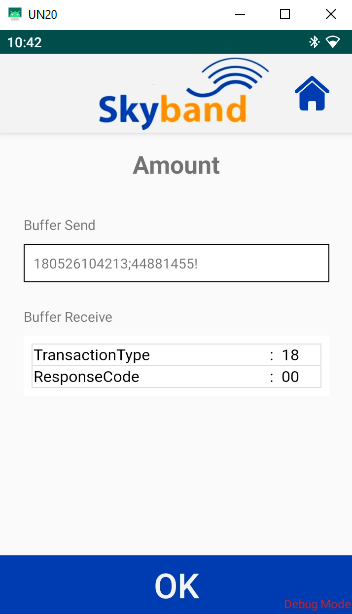
- Expected Result: Session start confirmation.
Important: Applies only to legacy ECR integrations. Not required for Local or Cloud Middleware integrations.
Step 6: Perform Transaction
Use the following code to send a Purchase request:
�A4�000000010000�180526104601�44881455000003�0�086901157a0c3191faabf3d7302ef9c37c4af528a217e923cc0d4a0d2bfc2f45�120�$
Transaction Type : A4
Amount : 100 SAR
Data(DDMMYYTTMMSS) : 180526104601
ECR reference number : 44881455000003
Print Flag : 0
Signature : 086901157a0c3191faabf3d7302ef9c37c4af528a217e923cc0d4a0d2bfc2f45
- Note: Transaction amount is in halalas. The amount will display on the terminal.
Step 7: Process Response
- Receive the response from the terminal.
- Use SDK utilities to parse the response.
- Extract:
- Response code (String)
- Approval code (String)
- Receipt data (String/JSON)
Example CSV string:
00,APPROVED,10000,140524193012,TX12345678,RECEIPT123
Parsed Output Mapping:
| Field | Example Value | Description |
|---|---|---|
| Response Code | 00 | Transaction result (00 = Approved) |
| Approval Code | APPROVED | Issuer/host approval code |
| Amount | 10000 | Transaction amount (in minor units) |
| Timestamp | 140524193012 | Date/time in ddMMyyHHmmss format |
| ECR Reference No | TX12345678 | Merchant’s transaction reference number |
| Receipt Data | RECEIPT123 | Printable receipt or structured payload |
Parsing Example (Java/Kotlin):*
String response = "00,APPROVED,10000,140524193012,TX12345678,RECEIPT123";
String[] fields = response.split(",");

String responseCode = fields[0];
String approvalCode = fields[1];
String amount = fields[2];
String timestamp = fields[3];
String ecrRefNo = fields[4];
String receiptData = fields[5];
Code Integration Flow
Provide equivalent Java/Kotlin snippets for each step (Add SDK, Configure Permissions, Establish Connection, Register, Start Session, Purchase, Response Parsing).
Notes on Legacy vs Adapter
- Legacy ECR Integrations: Require Register and Start Session steps.
- ECR Adapter Integrations: Do not require Register/Session.
- Documented separately to avoid confusion.
Handle Response
Use the SDK to parse and process the response.
Parse response:
String response = CLibraryLoad.getInstance().getParseData(responseData);
Process response:
- Convert to JSON.
- Store in app state.
- Display in UI.
- Validate transaction status.
- Generate receipt if required.